Last Updated on April 1, 2026 by Rita
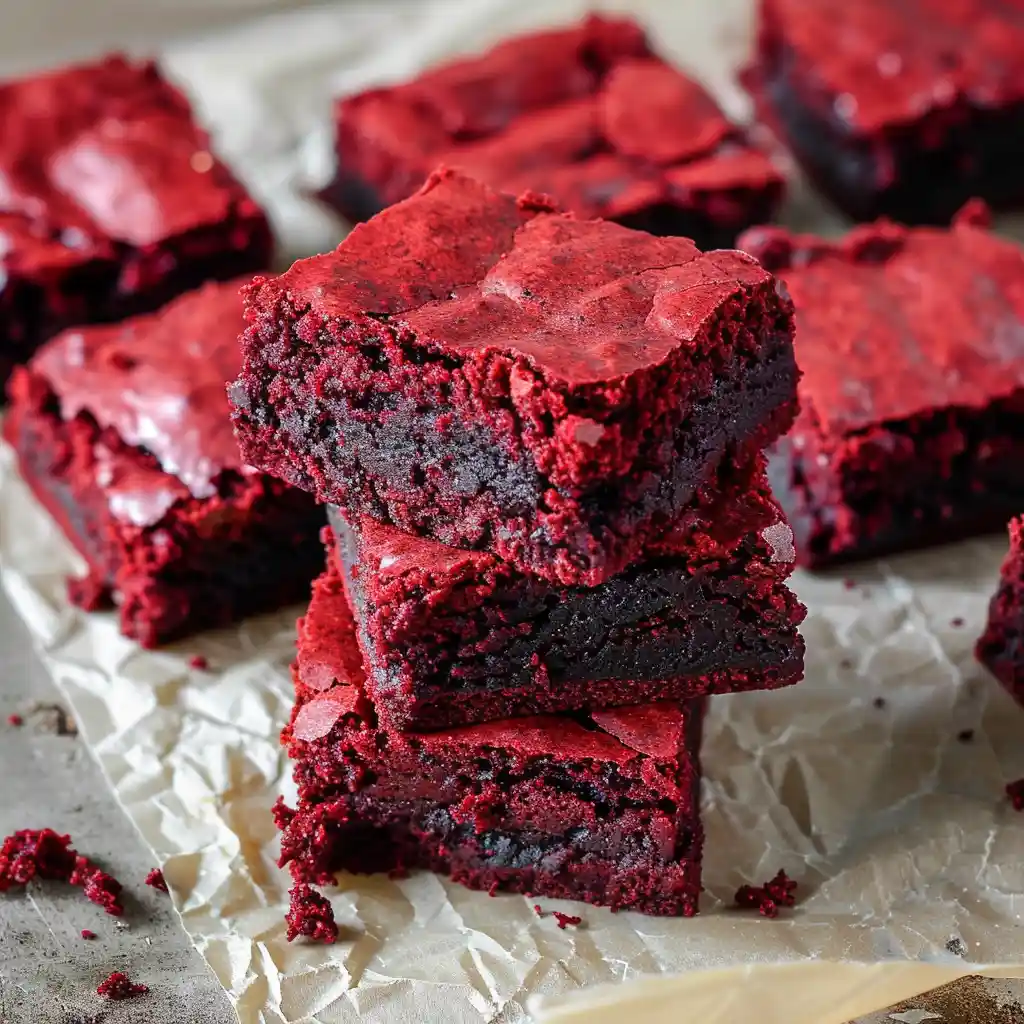
red velvet brownies are rich, fudgy dessert bars with a soft, moist center and a signature deep red color, ready in under 40 minutes. They are perfect for brownie lovers who want a slightly lighter cocoa flavor with a velvety texture and crackly top. I remember baking these in my cozy Oregon kitchen for Valentine’s Day, and the color alone made everyone smile. These red velvet brownies quickly became one of my favorite comfort desserts simple, beautiful, and irresistibly soft.
If you love indulgent treats like this, you’ll enjoy Mint Brownies for another rich and chocolatey bar.
Table of Contents
Table of Contents
What is Red Velvet Brownies?
red velvet brownies are a rich dessert bar that combines the fudgy texture of classic brownies with the signature flavor and color of red velvet cake. They have a soft, moist center, slightly crisp edges, and that iconic deep red hue that makes them stand out on any dessert table.
Unlike traditional brownies, these use a small amount of cocoa powder instead of a strong chocolate base. This creates a lighter chocolate flavor while allowing the buttery and slightly tangy notes to shine through. The addition of vinegar also enhances both the texture and color, giving the brownies a subtle lift and softness .
What I love most about red velvet brownies is their perfect balance. They feel indulgent, yet not overly heavy. Plus, they are incredibly versatile. You can enjoy them plain, dusted with powdered sugar, or topped with cream cheese frosting for a more decadent finish.
If you enjoy soft and rich dessert bars, you’ll love Carrot Cake Bars for another moist and flavorful option.
Print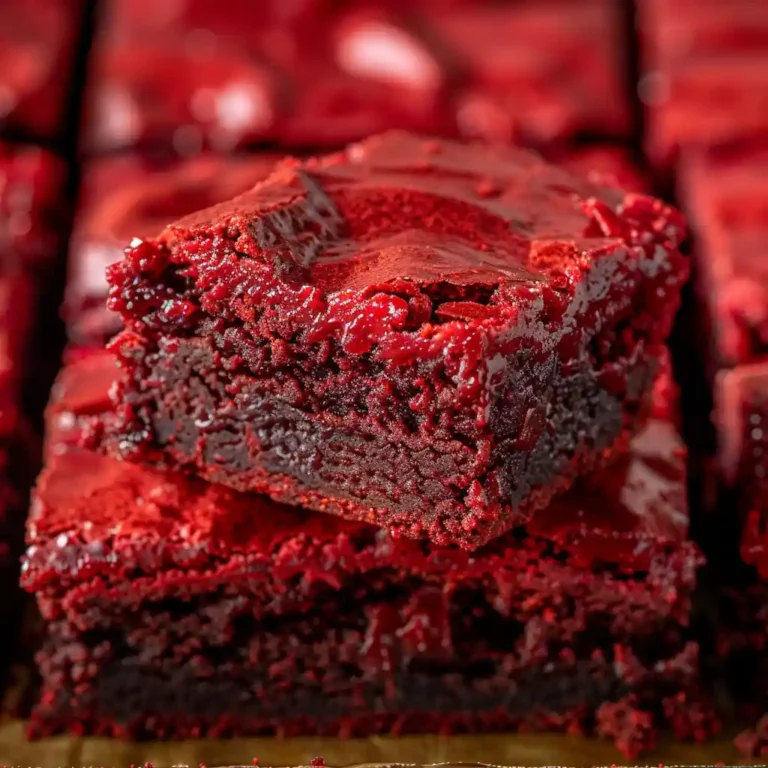
Red Velvet Brownies | Ultimate Fudgy & Easy Dessert Bars
These red velvet brownies are rich, fudgy, and soft with a classic crackly top and vibrant color.
- Total Time: 35 minutes
- Yield: 16 bars 1x
Ingredients
Instructions
1. Melt butter until hot
2. Mix in sugars while butter is hot
3. Add eggs vanilla food coloring and vinegar
4. Stir in dry ingredients until combined
5. Pour into lined pan and spread evenly
6. Bake at 350°F for 25 to 30 minutes then cool and slice
Notes
Use room temperature eggs
Do not overmix batter
Let brownies cool before slicing
- Prep Time: 10 minutes
- Cook Time: 25 minutes
- Category: Brownies and Bars
- Method: Baking
- Cuisine: American
- Diet: Vegetarian
Nutrition
- Serving Size: 1 bar
- Calories: 210
- Sugar: 18g
- Sodium: 95mg
- Fat: 11g
- Saturated Fat: 6g
- Unsaturated Fat: 4g
- Trans Fat: 0g
- Carbohydrates: 25g
- Fiber: 1g
- Protein: 3g
- Cholesterol: 45mg
Key Ingredients for Making Red Velvet Brownies
To create perfect red velvet brownies, each ingredient plays a key role in achieving that signature fudgy texture, vibrant color, and balanced flavor. Because this recipe blends brownie richness with red velvet softness, every component matters.
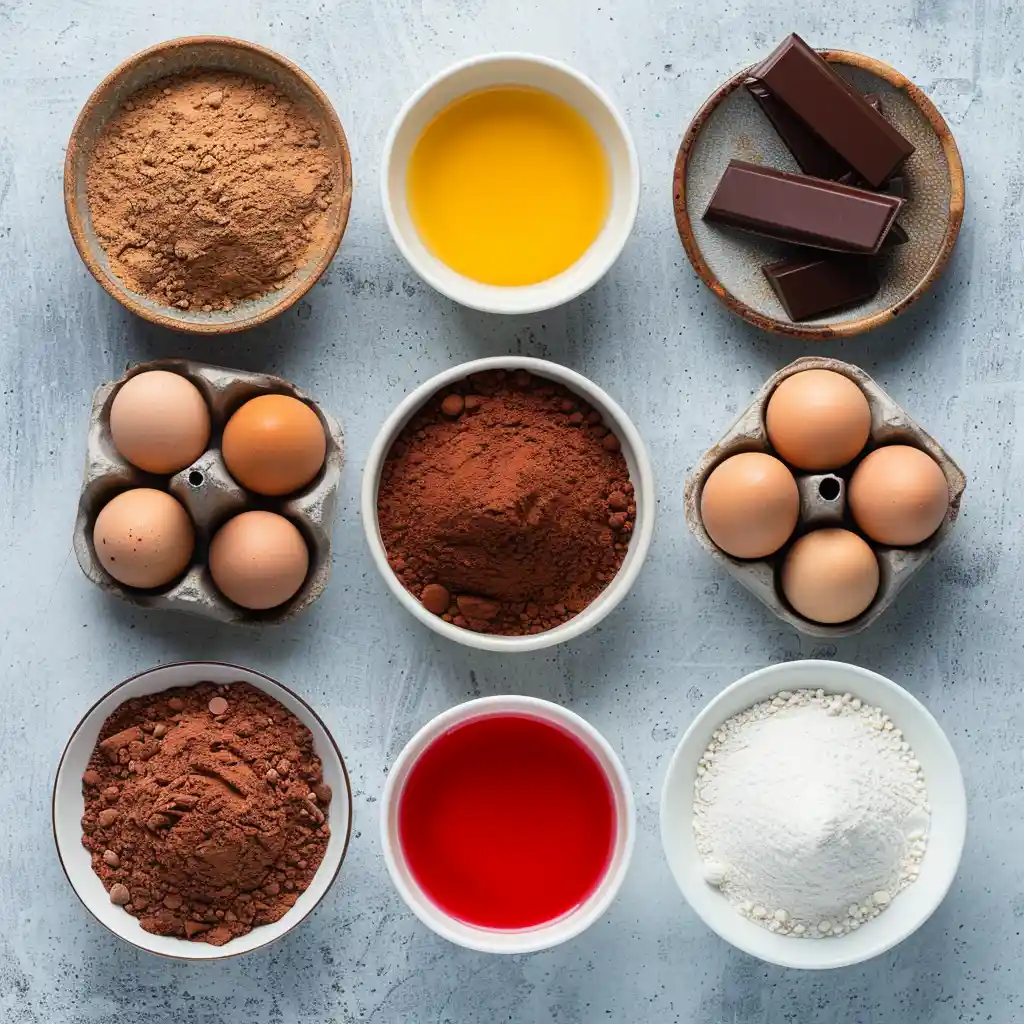
Essential Ingredients
| Ingredient | Role in Recipe | Tips |
|---|---|---|
| Butter | Adds richness and moisture | Use unsalted butter for better control of flavor |
| Granulated & brown sugar | Sweetness and texture | Combination creates moist centers and crisp edges |
| Eggs | Structure and fudginess | Use room temperature eggs for smooth batter |
| Cocoa powder | Light chocolate flavor | Use small amount to keep red color vibrant |
| Flour | Structure | Do not overmix to keep brownies soft |
| Red food coloring | Signature color | Gel works stronger than liquid |
| White vinegar | Enhances texture and color | Adds slight tang and softness |
| Vanilla extract | Flavor depth | Use pure vanilla for best taste |
| Baking soda & salt | Balance and lift | Helps achieve soft, airy fudgy texture |
Butter and sugar form the base of these brownies. Mixing sugar into hot melted butter helps create that classic crackly top, which makes brownies so irresistible .
Eggs are especially important here. Using them at room temperature ensures a smooth batter and prevents the butter from clumping, which keeps the texture consistent.
Cocoa powder is used sparingly. This allows the brownies to keep their signature red velvet flavor instead of tasting like traditional chocolate brownies.
Optional Add-Ons
You can elevate your brownies with:
- Cream cheese frosting
- White chocolate chips
- Chocolate drizzle
I often add a simple cream cheese topping when I want something extra special it reminds me of classic red velvet cake in every bite.
If you enjoy rich dessert flavors, try Chocolate Cake with White Chocolate Frosting for another indulgent treat.
How to Make Red Velvet Brownies in 6 Easy Steps
Making red velvet brownies is simple and rewarding. With just a few steps, you can create rich, fudgy bars with a soft center and that classic crackly top.
Step-by-Step Instructions
Step 1: Melt the butter
Heat the butter in a saucepan until fully melted and slightly sizzling. This step helps develop that shiny, crackly brownie top.
Step 2: Add sugars to hot butter
Stir granulated and brown sugar into the hot butter immediately. This helps dissolve the sugar properly and improves texture .
Step 3: Mix wet ingredients

Transfer the mixture to a bowl. Then whisk in eggs, vanilla extract, red food coloring, and vinegar until smooth.
Step 4: Add dry ingredients
Add flour, cocoa powder, salt, and baking soda. Stir gently until just combined. Avoid overmixing to keep the brownies soft and fudgy.
Step 5: Pour and bake
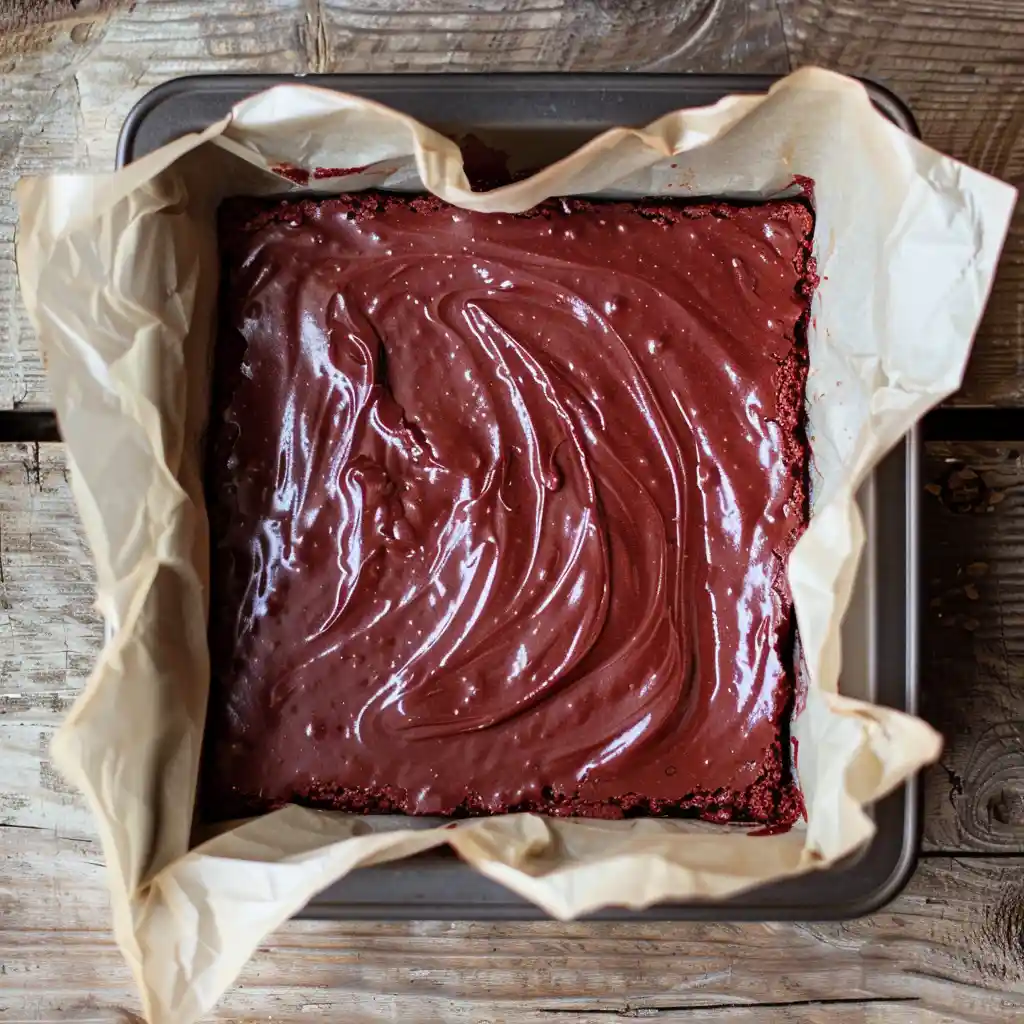
Spread the batter evenly into a lined baking pan. Bake at 350°F for about 25–30 minutes, until a toothpick shows a few moist crumbs.
Step 6: Cool and slice
Let the brownies cool for about 10 minutes, then transfer and slice once set. This helps maintain clean edges and perfect texture.
I always love this moment the smell, the color, and that first slice. It reminds me why simple baking brings so much joy.
If you enjoy easy baking recipes like this, try Coffee Cake Blondies Recipe for another soft and flavorful bar.
Essential Tools for Making This Recipe
You don’t need complicated equipment to make red velvet brownies, which makes this recipe easy and accessible for any home baker. With a few basic tools, you can achieve perfect results every time.
First, use a saucepan to melt the butter evenly. This step is important because hot butter helps create that signature crackly top. Then, grab a mixing bowl and a whisk to combine your ingredients smoothly and avoid lumps.
You’ll also need an 8×8 or 9×9 inch baking pan. Lining it with parchment paper makes it easy to lift the brownies out cleanly after baking. A spatula helps spread the batter evenly, ensuring consistent baking.
Finally, use a sharp knife for clean slices once the brownies cool.
If you enjoy simple baking setups like this, you’ll love making Chocolate Sugar Cookie Bars for another easy dessert bar.
The Health Benefits of Red Velvet Brownies
While red velvet brownies are an indulgent dessert, they can still offer some enjoyable benefits when made at home with quality ingredients. The key is balance and mindful portions.
First, cocoa powder provides small amounts of antioxidants. Even though the quantity is modest, it still adds a nutritional edge compared to desserts without cocoa. Additionally, eggs contribute protein, which helps create a more satisfying treat.
Butter adds richness and flavor, but it also helps keep the brownies moist. When you bake at home, you control the ingredients, which means no unnecessary preservatives or additives.
Another benefit is emotional comfort. I always find that baking something like red velvet brownies brings a sense of calm and joy. Sharing them with family or friends turns a simple dessert into a meaningful moment.
Of course, moderation matters. Enjoying one or two squares alongside a balanced diet allows you to treat yourself without overdoing it.
Additionally, making these brownies at home allows you to choose higher-quality ingredients and avoid unnecessary additives. You can even adjust portions or ingredients to suit your lifestyle. This flexibility makes red velvet brownies not just a treat, but a customizable dessert that fits into a balanced and mindful way of enjoying sweets.
If you enjoy desserts with a lighter twist, you might love Healthy Mug Cake Recipe for a quicker and more balanced option.
Expert Tips for the Best Texture
Getting the perfect texture in red velvet brownies comes down to a few key techniques. With the right approach, you’ll achieve that ideal balance of fudgy centers, soft crumb, and a crackly top.
First, always mix the sugar into hot melted butter. This step helps dissolve the sugar properly and creates that signature shiny, crackly surface. It makes a noticeable difference in the final result.
Next, use room temperature eggs. This ensures a smooth batter and prevents the butter from clumping. As noted in the original method, cold eggs can affect texture and consistency .
Also, avoid overmixing once you add the dry ingredients. Overmixing can make the brownies dense instead of soft and tender. Stir just until everything combines.
Another important tip is to watch baking time closely. Slightly underbaked brownies will stay fudgy, while overbaking leads to dryness. Look for moist crumbs on a toothpick rather than a completely clean result.
Finally, let the brownies cool before slicing. This helps them set properly and keeps the texture perfect.
If you love mastering textures, try Chocolate Fondant Mug Cake for a rich and gooey dessert.
Variations of Red Velvet Brownies
One of the best things about red velvet brownies is how easy they are to customize. With a few simple additions or swaps, you can create new flavors while keeping that rich, fudgy base.
Popular Variations
- Cream Cheese Frosted
Spread a smooth cream cheese frosting on top for a classic red velvet experience. This adds a tangy contrast that pairs perfectly with the sweetness. - White Chocolate Chip
Fold white chocolate chips into the batter for extra sweetness and creamy texture in every bite. - Chocolate Swirl
Add melted dark or milk chocolate and swirl it into the batter before baking for a marbled effect. - Nutty Crunch
Mix in chopped walnuts or pecans to add texture and a slightly toasted flavor. - Double Chocolate Version
Increase the cocoa slightly and add chocolate chips for a richer, more chocolate-forward brownie.
Easy Flavor Twists
You can also adjust the flavor profile:
- Add a hint of espresso powder for deeper flavor
- Use beet powder instead of food coloring for a natural option
- Top with powdered sugar for a simple finish
I love switching between these variations depending on the occasion. For holidays, I go with cream cheese frosting. For everyday treats, I keep them simple and classic.
If you enjoy creative dessert variations, try Banana Chocolate Chip Bars for another delicious twist.
Storage and Reheating Tips for Red Velvet Brownies
Proper storage helps red velvet brownies stay soft, moist, and flavorful for days. Since these brownies have a rich and tender texture, storing them correctly keeps them from drying out.
First, place the brownies in an airtight container once they are completely cooled. You can store them at room temperature for up to 2–3 days. Keep them in a cool, dry place away from direct sunlight.
For longer freshness, store them in the refrigerator for up to 5–6 days. This is especially helpful if your brownies include cream cheese frosting. Before serving, let them sit at room temperature for a few minutes to soften.
You can also freeze red velvet brownies for up to 2 months. Wrap each piece individually in plastic wrap, then place them in a freezer-safe container. Thaw at room temperature or in the fridge before enjoying.
If you prefer warm brownies, heat a slice in the microwave for about 10–15 seconds. This brings back that soft, fudgy texture.
If you enjoy make-ahead desserts, try No Bake Fruit Tart for another easy and elegant option.
Troubleshooting Red Velvet Brownies
| Problem | Why it happens | How to fix it |
|---|---|---|
| Brownies too dry | Overbaking or too much flour | Reduce baking time and measure flour correctly |
| Brownies too cakey | Too much flour or overmixing | Mix gently and avoid adding extra flour |
| No crackly top | Butter wasn’t hot when mixed with sugar | Mix sugar into hot melted butter |
| Color not vibrant | Not enough food coloring or too much cocoa | Use gel coloring and reduce cocoa slightly |
| Dense or greasy texture | Butter too hot when adding eggs or overmixing | Let butter cool slightly and mix gently |
| Brownies stick to pan | Pan not lined properly | Use parchment paper with overhang |
Frequently Asked Questions About Red Velvet Brownies
What makes red velvet brownies different from regular brownies?
Red velvet brownies differ from regular brownies because they use less cocoa powder and include ingredients like vinegar and food coloring. This creates a lighter chocolate flavor, a softer texture, and that signature red color.
Why do you add vinegar to red velvet brownies?
Vinegar enhances both the color and texture. It reacts with baking soda to create a softer, slightly airy texture while also helping the red color appear more vibrant.
Can I make red velvet brownies without food coloring?
Yes, you can make them without food coloring. However, they will look more like classic brownies. For a natural option, you can use beet powder to achieve a similar red tone.
How do you know when red velvet brownies are done?
Insert a toothpick into the center. If it comes out with a few moist crumbs but no wet batter, the brownies are ready. This ensures they stay fudgy and not overbaked.
Can you freeze red velvet brownies?
Yes, red velvet brownies freeze very well. Wrap each piece individually and store in an airtight container for up to 2 months. Thaw before serving for best texture.
Do red velvet brownies need cream cheese frosting?
No, they taste delicious on their own. However, cream cheese frosting adds a classic red velvet flavor and makes them more indulgent.
Final Thoughts, Why You’ll Love This Red Velvet Brownies
There’s something truly irresistible about red velvet brownies. They combine the rich, fudgy texture of classic brownies with a soft, velvety bite and a beautiful color that makes every slice feel special. I always find myself coming back to this recipe when I want a dessert that looks impressive but feels easy to make.
In my Oregon kitchen, these brownies quickly became a favorite for celebrations and cozy evenings alike. I love how simple ingredients transform into something so indulgent. Whether you serve them plain or topped with cream cheese frosting, they always deliver comfort and joy.
And to me, that’s what baking is all about simple moments, shared sweetness, and a reminder that dessert is love you can taste.
Discover more cozy dessert recipes in minutes, comfort and sweetness await in every mug.
👉 Save your next craving on Pinterest boards and discover more no-bake dessert recipes you can make in just minutes.
👉 Join me on Facebook page and discover more quick dessert recipes made with love, your next 5-minute chocolate moment is waiting!
👉 Find me on Instagram to explore more 5-minute no-bake dessert ideas, simple, sweet, and made to warm your day.
“If you tried this recipe, tell me how it turned out. Did you keep it gooey or cook it fully?”