Last Updated on May 6, 2026 by Rita
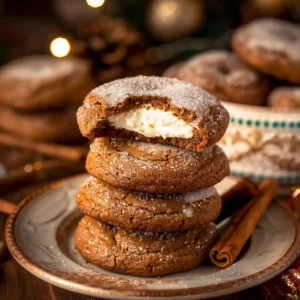
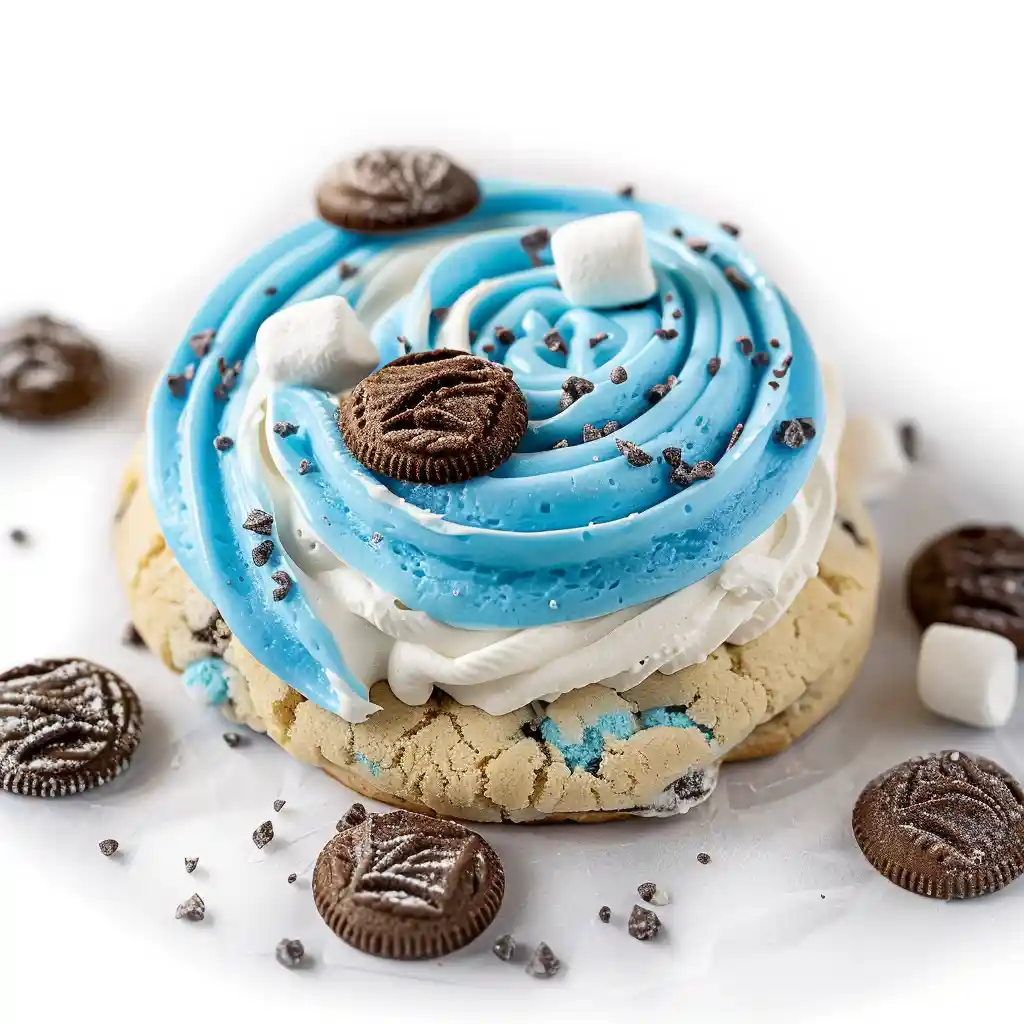
Dairy queen snowdrift cookie is a soft, chewy cake batter cookie loaded with crushed cookies and cream cookies and marshmallow fluff, ready in about 50 minutes plus cooling. This recipe answers your craving for a bakery-style cookie with a rich, gooey texture and creamy frosting. I first made dairy queen snowdrift cookie in my Oregon kitchen after craving that Blizzard flavor at home, and it instantly became a favorite. These cookies turn out thick, soft, and filled with swirls of marshmallow and crunchy cookie bits in every bite.
They truly bring that ice cream flavor into a cozy homemade dessert.
For another cozy cookie idea, I love baking Mini Egg Chocolate Cookies when I want something fun and colorful.
Table of Contents
Table of Contents
What is Dairy Queen Snowdrift Cookie?
Dairy queen snowdrift cookie is a thick, chewy cookie inspired by the Dairy Queen Blizzard, combining cake batter flavor, crushed cookies and cream cookies, and ribbons of marshmallow fluff. I love how this cookie transforms a frozen dessert into a soft, bakery-style treat that you can enjoy anytime without the mess of melting ice cream.
What makes dairy queen snowdrift cookie unique is its texture and layers. The dough stays soft and rich, while the crushed cookies add a slight crunch. At the same time, the marshmallow fluff creates gooey pockets throughout the cookie.
After baking, the cookie gets topped with two frostings one marshmallow and one cake batter which gives it that signature “snowdrift” look and flavor.
I always think of this recipe as a fun fusion between a cookie and a Blizzard. It feels indulgent, creative, and perfect for anyone who loves cookies and cream desserts.
When I want another rich cookie idea, I enjoy baking Cream Egg Stuffed Cookies for a similarly indulgent treat.
Key Ingredients for Making Dairy Queen Snowdrift Cookie
To make the best dairy queen snowdrift cookie, I always follow the exact ingredient list because each ingredient creates that rich Blizzard-inspired flavor and soft texture. I never change the wording because precision matters for both baking and consistency.
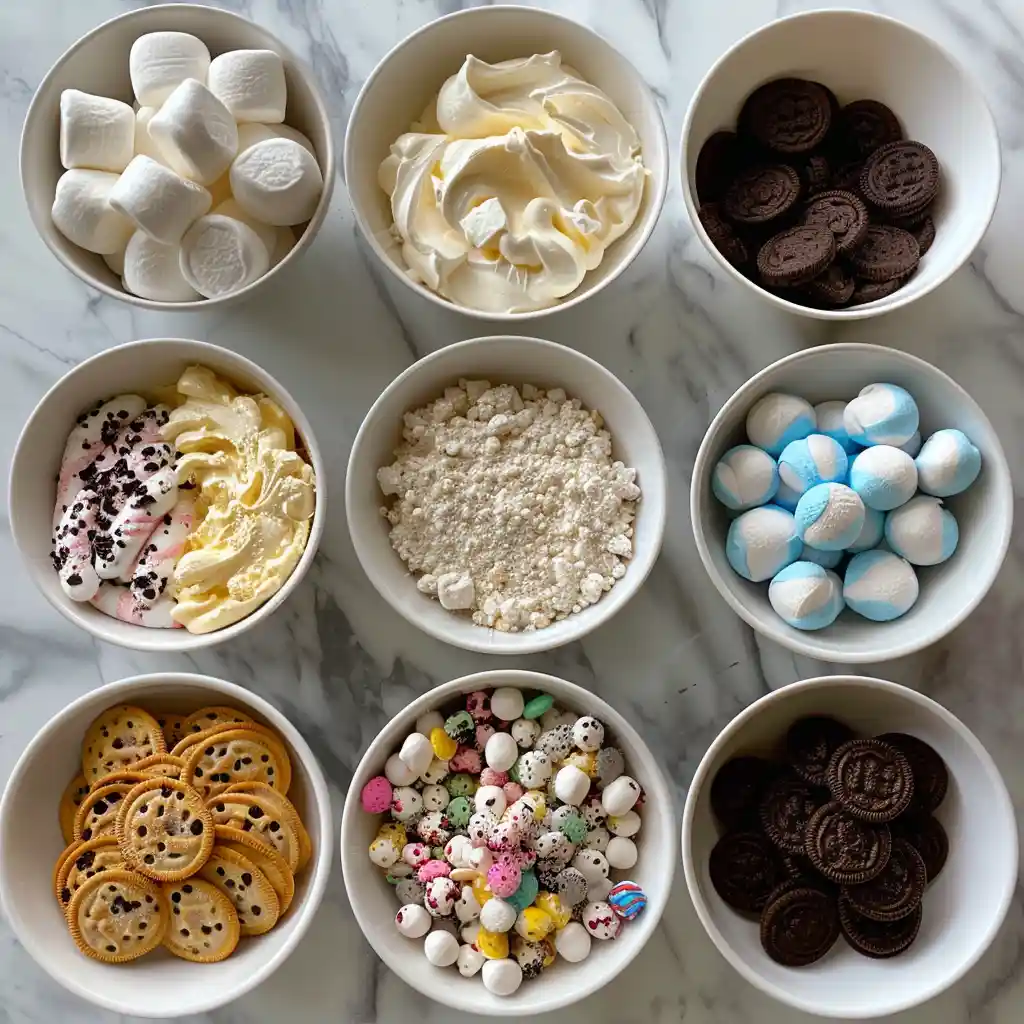
For the Cookie Dough
| Ingredient | Purpose |
|---|---|
| 1 1/2 cups salted butter, softened | Creates a rich base |
| 1 1/2 cups granulated sugar | Adds sweetness |
| 3 eggs | Binds ingredients |
| 1 1/2 tsp cake batter flavoring | Adds cake batter flavor |
| 4 1/2 cups all-purpose flour | Provides structure |
| 3 tsp baking powder | Helps cookies rise |
| 20 cookies and cream cookies, crushed | Adds cookies and cream texture |
| 3.5 oz marshmallow fluff (half of a 7 oz container) | Creates soft marshmallow ribbons |
These ingredients create the soft, chewy base of dairy queen snowdrift cookie with that signature cookies-and-cream texture.
For the Buttercream
| Ingredient | Purpose |
|---|---|
| 3/4 salted butter, softened | Base for frosting |
| 4 1/4 cups powdered sugar | Sweetens frosting |
| 2-4 Tbsp heavy cream | Adjusts consistency |
| 3.5 oz marshmallow fluff (other half of your 7 oz container) | Adds marshmallow flavor |
| 3/4 tsp cake batter flavoring | Enhances taste |
| Blue gel food coloring | Adds color |
| 10 cookies and cream cookies, crushed for garnish | Adds topping texture |
This frosting is what makes dairy queen snowdrift cookie look and taste like the Blizzard-inspired dessert.
For another rich cookie idea, I enjoy baking Cream Egg Stuffed Cookies when I want something equally indulgent.
How to Make Dairy Queen Snowdrift Cookie in 12 Steps
Making dairy queen snowdrift cookie feels like building layers of flavor, and I always follow each step carefully to get that soft texture and signature swirl.
Step-by-Step Instructions
Step 1: Preheat the oven
Preheat your oven to 350°F (180°C) and line a baking sheet with parchment paper or a silicone mat.
Step 2: Cream butter and sugar
Cream together the butter and granulated sugar until light and fluffy. This takes about 2 minutes and creates the perfect base.
Step 3: Add eggs and flavoring
Scrape the bowl, then add eggs and cake batter flavoring. Mix until fully incorporated.
Step 4: Add dry ingredients
Add flour and baking powder, then mix until a soft dough forms.
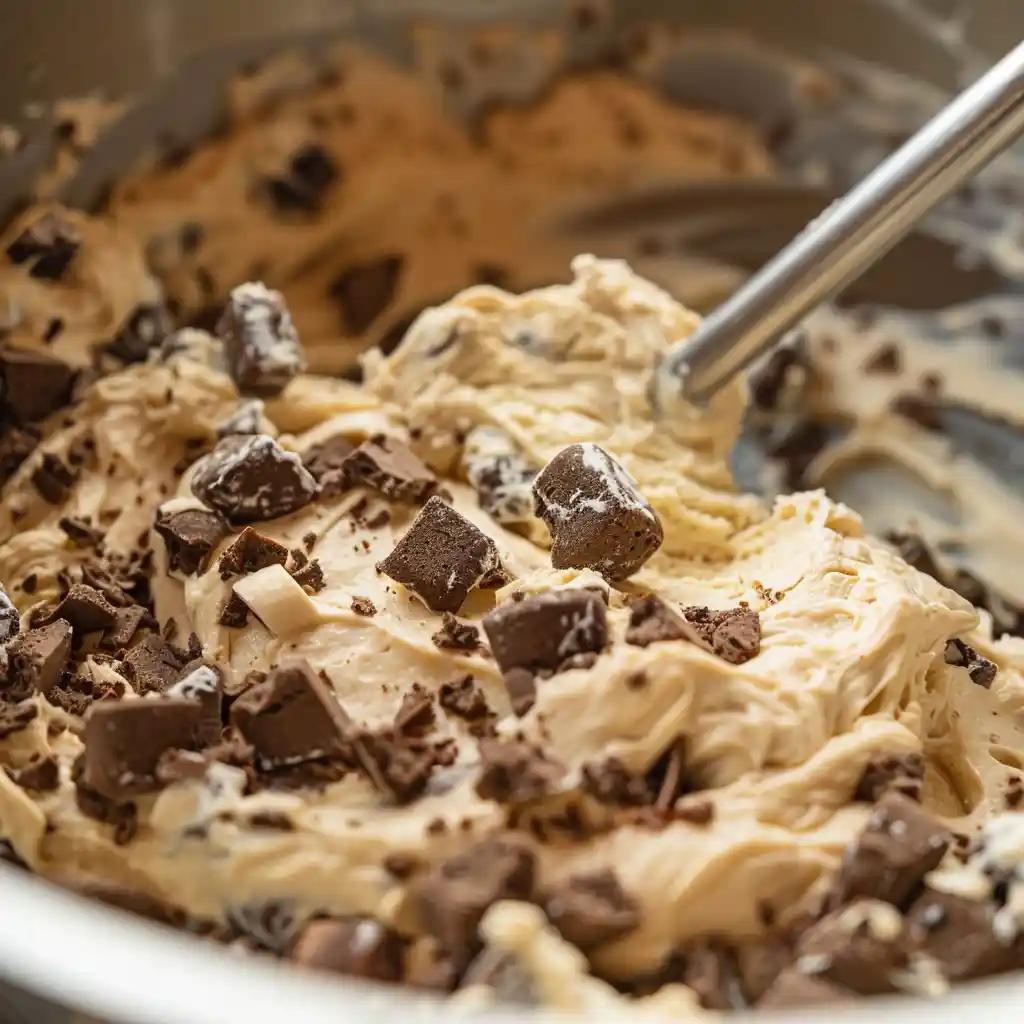
Step 5: Fold in cookies
Add the crushed cookies and cream cookies and mix gently to distribute evenly.
Step 6: Add marshmallow fluff
Drop small dollops of marshmallow fluff into the dough one at a time. Mix gently after each addition to create ribbons, not a fully blended dough.
Step 7: Shape cookies
Scoop dough using a large scoop and flatten slightly into thick puck shapes (about 3/4 inch thick).
Step 8: Bake cookies
Place cookies on the baking sheet and bake for 12–15 minutes until they no longer look glossy.
Step 9: Cool cookies
Let cookies cool slightly on the pan, then transfer to a rack to cool completely.
Step 10: Make buttercream
Beat butter until smooth, then add powdered sugar and heavy cream. Mix until creamy.
Step 11: Divide frosting
Remove about 1/4 of the frosting and mix it with marshmallow fluff. In the remaining frosting, add cake batter flavoring and blue gel food coloring, then whip until fluffy.
Step 12: Pipe and finish

Pipe both frostings together in a swirl on each cookie, then top with crushed cookies and cream cookies.
I love how dairy queen snowdrift cookie comes together in layers, especially when the frosting swirl adds that final Blizzard-inspired look.
For another fun baking idea, I sometimes make Mini Egg Chocolate Cookies when I want a colorful cookie variation.
Equipment Needed for Making This Recipe
To make dairy queen snowdrift cookie, I always organize my tools first because this recipe includes both baking and decorating steps. Having everything ready makes the process smooth and enjoyable.
You don’t need complicated tools, just a few essentials:
- Large mixing bowl
- Stand mixer or electric hand mixer
- Measuring cups and spoons
- Rubber spatula
- Baking sheet
- Parchment paper or silicone baking mat
- Cookie scoop (#12 size recommended)
- Cooling rack
- Piping bag
- Large round piping tip
I always rely on a cookie scoop to keep the cookies uniform in size. This helps them bake evenly and gives that thick, bakery-style look.
The piping bag is also important because it allows me to create the signature swirl using two frostings. That swirl is what makes dairy queen snowdrift cookie stand out visually.
When everything is set up ahead of time, the process feels much easier, especially when working with frosting and decorations.
When I want another fun baking project with decorating, I also enjoy Gingerbread Cheesecake Cookies for a festive twist.
The Health Benefits of Dairy Queen Snowdrift Cookie
While dairy queen snowdrift cookie is clearly an indulgent dessert, I still like to understand what each ingredient brings to the table. I always believe desserts should be enjoyed for comfort first, but knowing the ingredients helps me enjoy them more mindfully.
This cookie focuses on rich flavor and texture, but a few ingredients still offer small benefits when enjoyed in moderation.
Here’s a simple breakdown:
| Ingredient | Benefit |
|---|---|
| Eggs | Provide protein and structure |
| Butter | مصدر energy and richness |
| Flour | Supplies carbohydrates for energy |
| Marshmallow fluff | Adds quick energy and texture |
| Cookies and cream cookies | Add flavor and crunch |
The combination of ingredients creates the soft, layered texture that makes dairy queen snowdrift cookie so satisfying.
I always treat this cookie as a special dessert rather than an everyday snack. That balance helps me fully enjoy the rich flavors without overdoing it.
Because this recipe includes frosting and mix-ins, it feels more like a bakery-style treat. That’s why I often save it for sharing or special occasions.
When I want something simpler between indulgent desserts, I sometimes switch to 4 Ingredient No Bake Carrot Oatmeal Cookies for a lighter option.
Expert Tips for the Best Texture
Getting the perfect texture in dairy queen snowdrift cookie comes down to a few key techniques that I always follow. These cookies should turn out soft, thick, and slightly gooey with visible marshmallow ribbons and cookie chunks.
First, I always cream the butter and sugar properly. I mix until the texture becomes light and fluffy because this step builds the foundation for a soft cookie.
Next, I make sure not to overmix after adding the flour. Once the dough forms, I stop mixing to keep the cookies tender instead of dense.
One of the most important tips is how I handle the marshmallow fluff. I add it in small dollops and mix gently so it creates ribbons instead of blending fully into the dough.
Here are my go-to texture tips:
- Cream butter and sugar until light and fluffy
- Do not overmix after adding dry ingredients
- Gently fold in crushed cookies
- Add marshmallow fluff in small portions
- Keep cookies thick when shaping
- Avoid overbaking
I also pay close attention to baking time. I remove the cookies when they no longer look glossy but still feel soft in the center. This keeps dairy queen snowdrift cookie chewy and moist.
Finally, I always let the cookies cool slightly before frosting. This helps the frosting hold its shape and keeps the layers clean and defined.
When I want another soft and rich cookie idea, I enjoy making Peanut Butter Blossoms for a classic chewy texture.
Variations of Dairy Queen Snowdrift Cookie
One of the things I enjoy most about dairy queen snowdrift cookie is how easy it is to customize while keeping that soft, bakery-style texture. I like to experiment with flavors and toppings depending on the occasion, and this cookie always adapts beautifully.
If I want a more chocolate-forward version, I sometimes mix in extra crushed chocolate cookies or even add chocolate chips. This creates a richer cookies-and-cream flavor.
For a fun twist, I swap the cake batter flavoring with vanilla or almond extract. This slightly changes the taste while still keeping the cookie soft and indulgent.
Here are some of my favorite variations:
| Variation | What to Change |
|---|---|
| Extra cookies & cream | Add more crushed cookies to dough |
| Chocolate lovers | Mix in chocolate chips |
| Vanilla twist | Replace cake batter flavoring with vanilla extract |
| Single frosting | Combine both frostings into one |
| Color swap | Use different gel colors for themed events |
I also like simplifying the frosting sometimes. Instead of piping two colors, I mix everything into one frosting for a quicker version.
Another fun idea is changing the topping colors for different holidays or celebrations. It keeps dairy queen snowdrift cookie feeling fresh and creative every time I bake it.
When I want another playful cookie idea, I enjoy baking Mini Egg NYC Cookies for a colorful bakery-style treat.
Storage and Reheating Tips for Dairy Queen Snowdrift Cookie
I always store dairy queen snowdrift cookie carefully because the soft texture and layered frosting need the right conditions to stay fresh and delicious. With proper storage, these cookies hold their bakery-style quality for days.
First, I let the cookies cool completely and allow the frosting to set. This step prevents smudging and keeps the swirl design intact.
Then, I place them in an airtight container and store them at room temperature. They stay fresh for up to 3 days while maintaining their soft texture.
Here’s the simple storage guide I follow:
| Method | How to Store | Duration |
|---|---|---|
| Room temperature | Airtight container | Up to 3 days |
| Freezer | Store in sealed freezer bag | Up to 3 months |
If I want to freeze them, I place the cookies on a tray first until firm, then transfer them to a bag. This keeps the frosting from sticking or smearing.
When I’m ready to enjoy them again, I let them thaw at room temperature. I avoid microwaving because it can melt the frosting and change the texture.
I’ve noticed that dairy queen snowdrift cookie stays soft even after freezing, which makes it perfect for planning ahead.
When I prepare a dessert spread, I sometimes pair these with No Bake Biscoff Pie for a mix of creamy and chewy textures.
Common Mistakes to Avoid When Making Dairy Queen Snowdrift Cookie
Even though dairy queen snowdrift cookie is fun to make, a few common mistakes can affect the texture, structure, and final look. I’ve made these mistakes myself, so I always pay attention to these details now.
One of the biggest mistakes is overmixing the dough after adding flour. When I do that, the cookies turn dense instead of soft. I always mix just until the dough forms.
Another common issue is overmixing the marshmallow fluff. If I fully blend it in, I lose those signature gooey ribbons that make the cookie unique.
Here are the most important mistakes I avoid:
| Mistake | Why It Matters |
|---|---|
| Overmixing dough | Makes cookies dense |
| Overmixing marshmallow fluff | Removes ribbon texture |
| Overbaking | Dries out cookies |
| Flattening dough too much | Loses thick bakery shape |
| Skipping cooling time | Melts frosting |
I also make sure not to overbake. I remove the cookies when they no longer look glossy, but still feel soft. This keeps dairy queen snowdrift cookie chewy and moist.
Another detail I watch closely is shaping. I keep the dough thick so the cookies bake tall and soft instead of spreading too much.
Finally, I always let the cookies cool before frosting. This keeps the frosting stable and helps create that clean, swirled finish.
Frequently Asked Questions About Dairy Queen Snowdrift Cookie
Can I make dairy queen snowdrift cookie ahead of time?
Yes, you can make dairy queen snowdrift cookie ahead of time. Bake the cookies and store them unfrosted or frosted in an airtight container for up to 3 days. You can also freeze them for longer storage.
How do I get the marshmallow swirl inside the cookies?
To get the marshmallow swirl in dairy queen snowdrift cookie, add marshmallow fluff in small dollops and gently mix after each addition. Do not fully blend it. This keeps visible ribbons of marshmallow throughout the dough.
Can I freeze dairy queen snowdrift cookies?
Yes, these cookies freeze well. Place them in a sealed freezer bag and store for up to 3 months. Thaw at room temperature before serving.
Why are my cookies not thick and soft?
If your cookies are not thick, you may have flattened the dough too much or overbaked them. I always keep the dough thick and remove the cookies when they no longer look glossy to keep dairy queen snowdrift cookie soft and chewy.
Final Thoughts, Why You’ll Love This Dairy Queen Snowdrift Cookie
I always come back to dairy queen snowdrift cookie when I want something fun, rich, and truly unforgettable. This cookie brings together everything I love soft cake batter flavor, crunchy cookies and cream, and those gooey marshmallow ribbons that make every bite different.
What makes this recipe special for me is how creative it feels. I take a classic Blizzard flavor and turn it into a bakery-style cookie right in my Oregon kitchen. Every time I pipe that swirl of frosting on top, I remember how much joy simple baking can bring.
I also love how this recipe feels both indulgent and approachable. Even though it looks impressive, the steps stay simple and rewarding. Whether I’m baking for friends or just treating myself, dairy queen snowdrift cookie always delivers that perfect mix of comfort and excitement.
Most importantly, these cookies are made to share. They’re big, soft, and full of flavor perfect for creating sweet moments with the people around you.
Discover more cozy dessert recipes in minutes, comfort and sweetness await in every mug.
👉 Save your next craving on Pinterest boards and discover more no-bake dessert recipes you can make in just minutes.
👉 Join me on Facebook page and discover more quick dessert recipes made with love, your next 5-minute chocolate moment is waiting!
“If you tried this recipe, tell me how it turned out. Did you keep it gooey or cook it fully?”
Print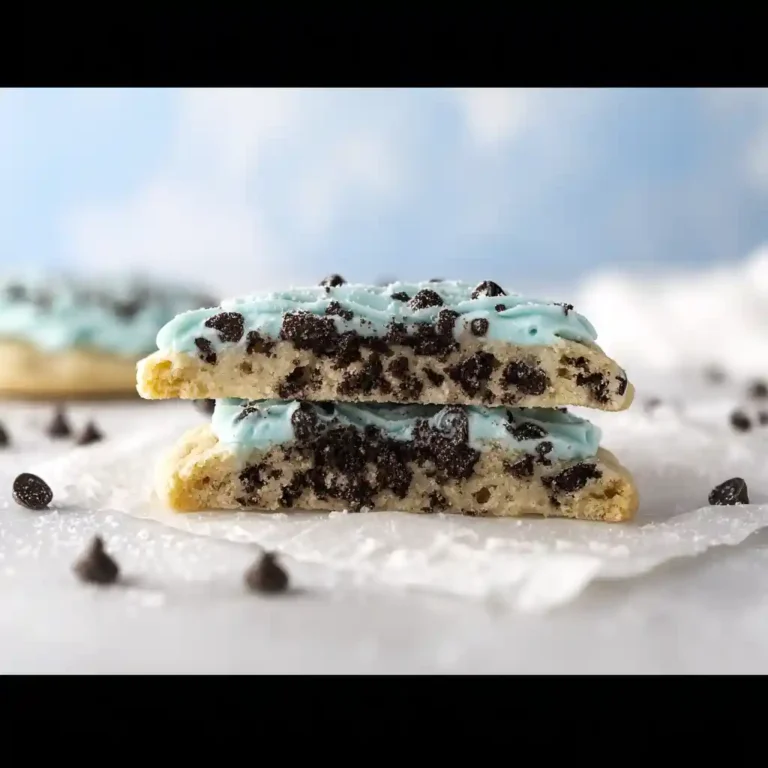
How to Make Dairy Queen Snowdrift Cookie – Ultimate Copycat Guide
Soft dairy queen snowdrift cookie with cake batter flavor, cookies and cream, and marshmallow frosting swirl.
- Total Time: 50 minutes
- Yield: 20 cookies 1x
Ingredients
Instructions
1. Preheat the oven to 350°F (180°C) and line a baking sheet with parchment paper or a silicone mat.
2. Cream together the butter and granulated sugar until light in color and fluffy in texture.
3. Add eggs and cake batter flavoring and mix until incorporated.
4. Add flour and baking powder and mix until a soft dough forms.
5. Add crushed cookies and mix gently.
6. Add marshmallow fluff in small dollops and gently mix to create ribbons.
7. Scoop dough and flatten slightly.
8. Bake for 12-15 minutes until cookies no longer look glossy.
9. Cool cookies completely.
10. Make buttercream by mixing butter powdered sugar and cream.
11. Divide frosting and mix marshmallow fluff into one portion.
12. Add flavoring and blue coloring to the other portion and whip.
13. Pipe frosting swirl and top with crushed cookies.
Notes
Do not overmix marshmallow fluff
Keep cookies thick
Do not overbake
Store in airtight container up to 3 days
- Prep Time: 30 minutes
- Cook Time: 20 minutes
- Category: Cookies
- Method: Baking
- Cuisine: American
- Diet: Vegetarian