Last Updated on July 18, 2026 by Rita
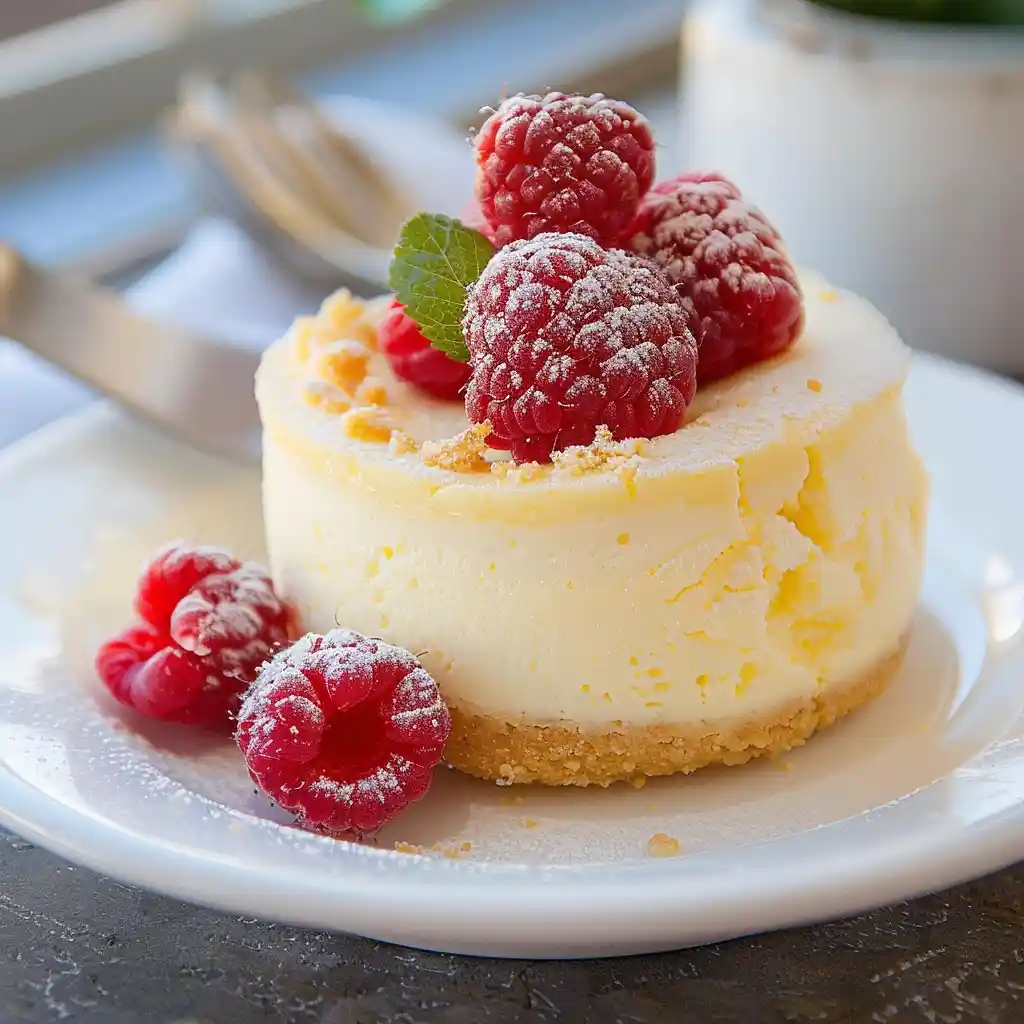
Mug cake cheesecake is a quick single-serving dessert made in the microwave that delivers classic cheesecake flavor in about 10 minutes. If you’re looking for a healthy mug cake that’s creamy, soft, and perfectly portioned, this recipe gives you all the cheesecake satisfaction without baking a full cake. I love making this easy cheesecake whenever I want a cozy dessert for one. If you enjoy lighter microwave treats, you’ll also love Healthy Mug Cake because it offers another simple option for busy days.
Table of Contents
Table of Contents
Ingredients You’ll Need for Mug Cake Cheesecake
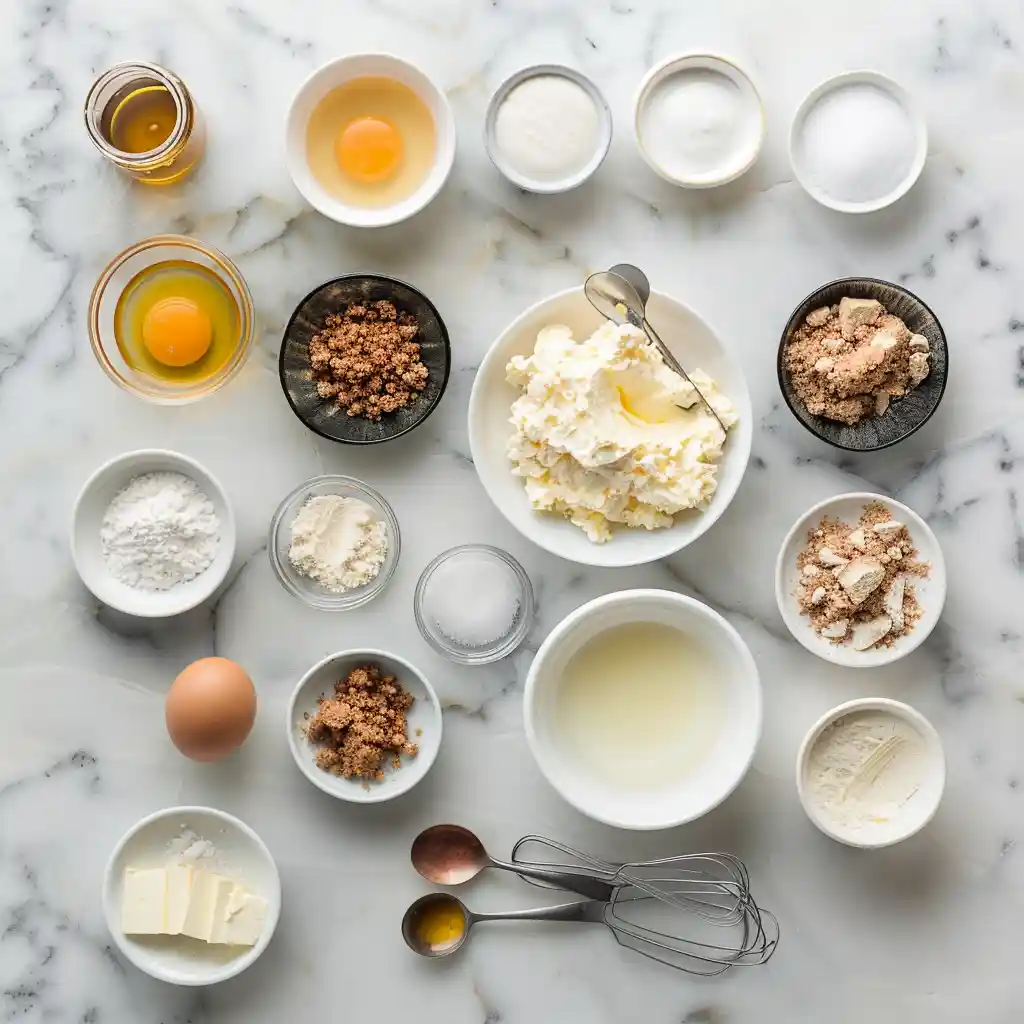
Making a delicious mug cake cheesecake requires just a handful of everyday ingredients, and each one plays an important role in creating the rich flavor and smooth texture. The graham cracker crust adds the classic cheesecake crunch, while cream cheese and Greek yogurt create a lighter filling that still tastes wonderfully creamy. I like using softened cream cheese because it blends much more easily, giving the batter a silky finish. If you enjoy healthier microwave desserts, I also recommend Healthy Mug Cake Greek Yogurt for another protein-rich treat.
| Ingredient | Amount | Purpose |
|---|---|---|
| Cream cheese, softened (or cream cheese spread) | 4 tablespoons | Creates the rich cheesecake base |
| Plain nonfat Greek yogurt | 2 tablespoons | Adds creaminess while keeping it lighter |
| Granulated sugar | 2½ tablespoons | Sweetens the filling |
| Large egg, whisked | 1 | Gives structure and a smooth texture |
| Vanilla extract | ¼ teaspoon | Enhances the cheesecake flavor |
| Graham cracker crumbs | 4 tablespoons | Forms the classic buttery crust |
| Melted butter | 1 tablespoon | Holds the crust together |
The combination of cream cheese and Greek yogurt makes this dessert lighter than many traditional cheesecakes while still delivering the familiar tangy flavor. Pressing the graham cracker crumbs firmly into the mug also helps create a crust that stays together after cooking.
How to Make Mug Cake Cheesecake in 4 Easy Steps
Making this mug cake cheesecake is simple, and each step helps create a creamy dessert with the best texture. I always cook my mug cake cheesecake in short microwave bursts instead of one long cycle because it cooks more evenly and prevents splattering. The final chilling time is just as important as the cooking time, since it gives the cheesecake its signature flavor and firm, creamy consistency. For another easy microwave dessert, I also enjoy 1 Minute Microwave Cheesecakes.
Step 1 – Prepare the Graham Cracker Crust
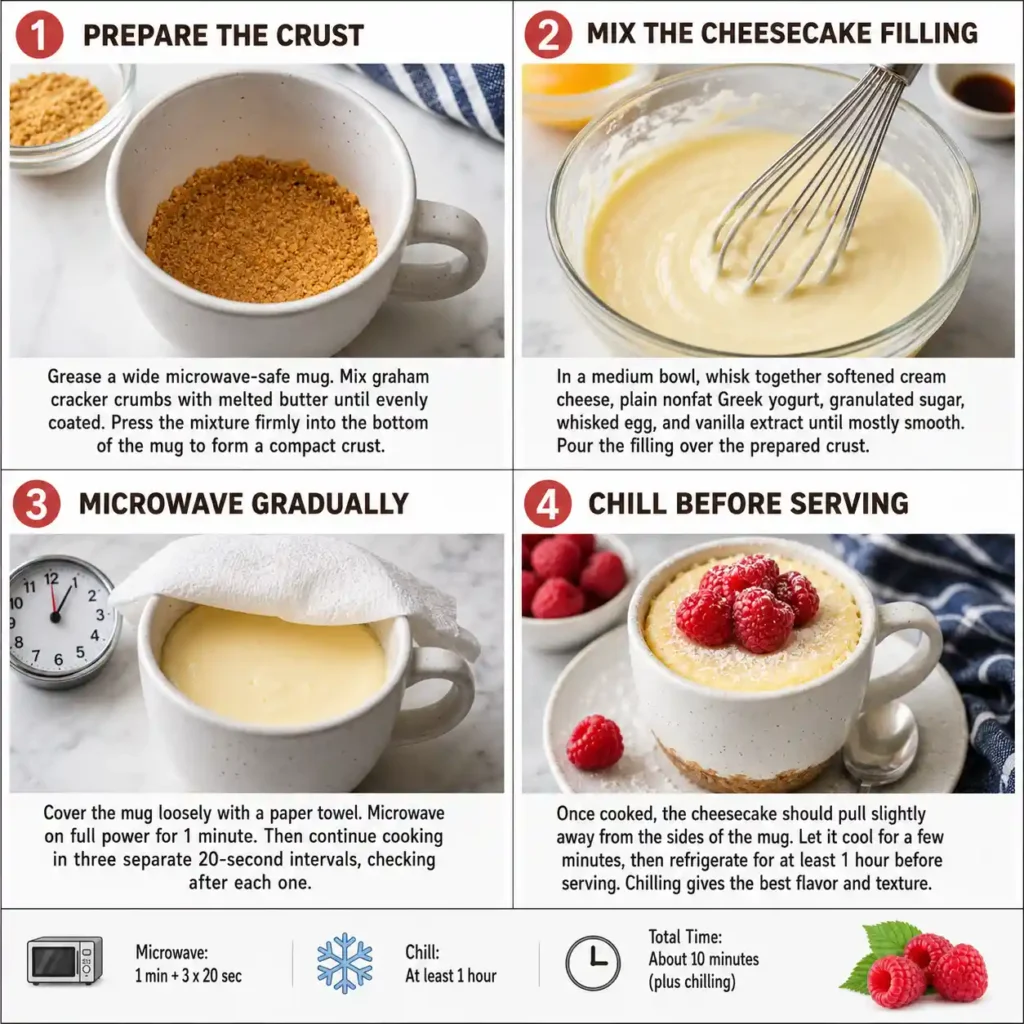
Grease the inside of a wide microwave-safe mug, including the bottom and sides. Add the graham cracker crumbs and melted butter, then stir until every crumb is evenly coated. Press the mixture firmly into the bottom of the mug with your fingers to create a compact crust that holds together after cooking.
Step 2 – Mix the Cheesecake Filling
In a medium bowl, whisk together the softened cream cheese, plain nonfat Greek yogurt, granulated sugar, whisked egg, and vanilla extract until the batter becomes mostly smooth. A few tiny cream cheese lumps are fine, but mix well to create a silky filling. Pour the cheesecake mixture over the prepared crust.
Step 3 – Microwave in Short Intervals
Cover the mug loosely with a paper towel. Microwave the mug cake cheesecake on full power for 1 minute. Check the center, then continue cooking for three separate 20-second intervals, checking after each round. This gradual method helps the cheesecake cook evenly without overheating or splattering.
Step 4 – Cool and Chill Before Serving
When the mug cake cheesecake is fully cooked, it should pull slightly away from the sides of the mug. Carefully remove it onto a plate if desired, or leave it in the mug. Let it cool at room temperature for a few minutes, then refrigerate for at least 1 hour before serving. Chilling allows the cheesecake flavor to fully develop and gives the dessert its rich, creamy texture.
Tools for Making Mug Cake Cheesecake
You don’t need any special equipment to make a delicious mug cake cheesecake. A few basic kitchen tools help you create a smooth filling, a firm graham cracker crust, and an evenly cooked dessert. I recommend using a wide microwave-safe mug because it gives you enough room to press the crust with your fingers and allows the mug cake cheesecake to cook more evenly. If you enjoy quick cheesecake desserts, you’ll also love Cheese Mug Cake for another creamy microwave treat.
- Wide microwave-safe mug
- Medium mixing bowl
- Small whisk
- Measuring tablespoons and teaspoons
- Spoon for mixing
- Paper towel to loosely cover the mug
- Rubber spatula (optional, for removing the cheesecake)
- Refrigerator for chilling and setting the cheesecake
Cozy Tips & Smart Variations for Mug Cake Cheesecake
This mug cake cheesecake is easy to customize while keeping its creamy texture and classic cheesecake flavor. I always soften the cream cheese before mixing because it creates a smoother batter with fewer lumps. For the best results, don’t skip the chilling time. A well-chilled mug cake cheesecake tastes richer, creamier, and much closer to a traditional baked cheesecake. If you enjoy healthier single-serve desserts, I also recommend Cottage Cheese Cheesecake Mug Cake for a high-protein alternative.
- Soften the cream cheese for easier whisking and a smoother filling.
- Press the graham cracker crust firmly so it stays together after cooking.
- Microwave in short intervals instead of all at once to prevent splattering.
- Let the cheesecake chill for at least 1 hour before serving for the best flavor and texture.
- Top with fresh raspberries, blueberries, sliced strawberries, or a light whipped topping.
- Add a little lemon zest or a few chocolate chips to the filling for an easy flavor twist.
- Use reduced-fat cream cheese if you want a slightly lighter mug cake cheesecake without changing the preparation method.
Why You’ll Love Mug Cake Cheesecake
This mug cake cheesecake is the perfect dessert when you want homemade cheesecake without baking a full-sized cake. I love that this mug cake cheesecake comes together in about 10 minutes with simple pantry ingredients, then chills into a rich, creamy treat that’s perfectly portioned for one. Whether you’re craving a quick weeknight dessert or a healthier mug cake option with Greek yogurt, this recipe delivers satisfying flavor with very little effort. If you enjoy easy microwave desserts, don’t miss Microwave Mug Cake Healthy for another wholesome favorite.
- Ready in about 10 minutes plus chilling time.
- Makes a single serving, so there’s no leftover cheesecake.
- Features a classic graham cracker crust and creamy cheesecake filling.
- Uses Greek yogurt for a lighter texture while maintaining rich flavor.
- Cooks entirely in the microwave, with no oven required.
- Requires only a handful of common kitchen ingredients.
- Easy to customize with fresh berries, whipped cream, or chocolate chips.
- Perfect for satisfying cheesecake cravings without making a full dessert.
- Beginner-friendly with simple, step-by-step preparation.
- Delivers the classic taste of mug cake cheesecake in a quick and convenient format.
Frequently Asked Questions About Mug Cake Cheesecake
Can I make mug cake cheesecake ahead of time?
Yes. Mug cake cheesecake actually tastes better after it has chilled. Prepare it up to one day in advance, cover it, and store it in the refrigerator until you’re ready to enjoy it. The extra chilling time helps the cheesecake become firmer and enhances its creamy flavor.
Why does my mug cake cheesecake taste eggy?
An eggy flavor usually means the cheesecake hasn’t chilled long enough. After microwaving, let the mug cake cheesecake cool for a few minutes at room temperature, then refrigerate it for at least 1 hour. This resting time allows the flavors to develop and the texture to become smooth and creamy.
Can I use regular yogurt instead of Greek yogurt?
Greek yogurt works best because it’s thicker and creates a richer filling. If you use regular plain yogurt, the mug cake cheesecake may turn out slightly softer. For the closest texture to classic cheesecake, stick with plain nonfat Greek yogurt.
Why do I microwave the cheesecake in short intervals?
Cooking the mug cake cheesecake in several short intervals prevents the batter from overheating and splattering. It also helps the filling cook more evenly, leaving the center creamy instead of rubbery. Once cooking is complete, chilling the cheesecake gives it the best flavor and texture.
Final Thoughts on Mug Cake Cheesecake
If you’re craving cheesecake but don’t want to bake an entire dessert, mug cake cheesecake is the perfect solution. I love how this mug cake cheesecake combines a buttery graham cracker crust with a smooth, creamy filling in a convenient single serving.
With just a few simple ingredients and about 10 minutes of preparation, you can enjoy a homemade dessert that’s both satisfying and easy to make. Microwave the cheesecake in short intervals, then chill it for at least 1 hour. That waiting time makes a big difference in both flavor and texture.
Top your mug cake cheesecake with fresh berries, a dollop of whipped cream, or enjoy it plain. Every bite delivers classic cheesecake flavor in a quick, cozy, and healthier microwave dessert.
If you’re building a collection of easy single-serve treats, this mug cake cheesecake is a recipe you’ll want to make again and again.
Print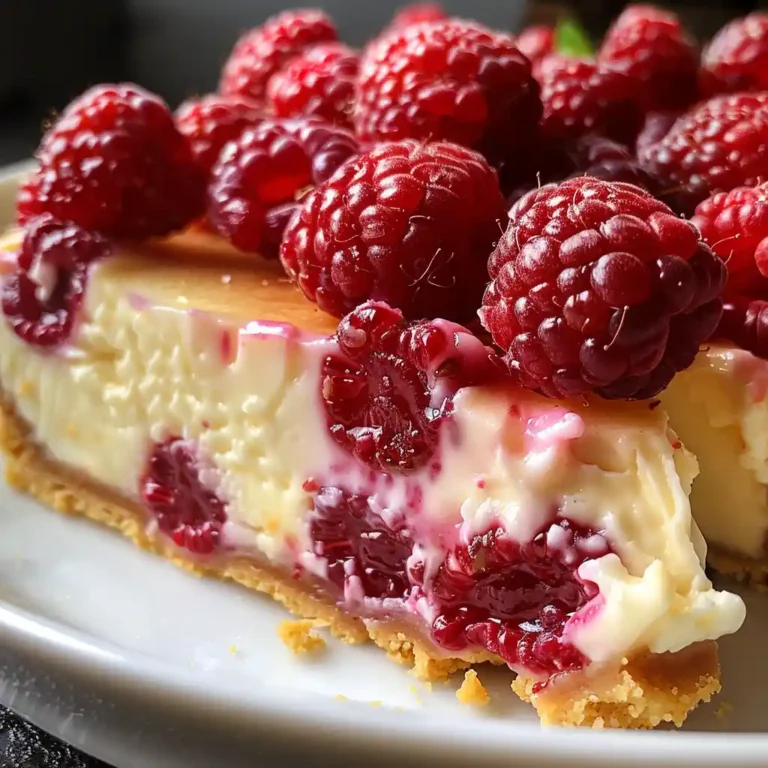
Mug Cake Cheesecake: Healthy Single-Serve Microwave Dessert in 10 Minutes
This creamy Mug Cake Cheesecake is a single-serving microwave dessert with a buttery graham cracker crust and a smooth cheesecake filling. It comes together in about 10 minutes and tastes even better after chilling.
- Total Time: 10 minutes
- Yield: 1 serving 1x
Ingredients
Instructions
1. Grease a wide microwave-safe mug.
2. Mix the graham cracker crumbs with the melted butter until evenly coated. Press the mixture firmly into the bottom of the mug to form a compact crust.
3. In a medium bowl, whisk together the softened cream cheese, Greek yogurt, granulated sugar, whisked egg, and vanilla extract until mostly smooth.
4. Pour the cheesecake filling over the prepared crust.
5. Cover the mug loosely with a paper towel.
6. Microwave on full power for 1 minute.
7. Continue microwaving in three separate 20-second intervals, checking after each interval until the cheesecake is fully cooked.
8. Let the cheesecake cool for several minutes at room temperature.
9. Refrigerate for at least 1 hour before serving for the best texture and flavor.
Notes
Use softened cream cheese for the smoothest batter.
Press the graham cracker crust firmly so it holds together.
Microwave in short intervals to prevent splattering.
Tiny cream cheese lumps are acceptable.
Do not skip the chilling time. Refrigerating for at least one hour gives the cheesecake its classic flavor and creamy texture.
- Prep Time: 8 minutes
- Cook Time: 2 minutes
- Category: Healthy Mug Cakes
- Method: Microwave
- Cuisine: American
- Diet: Vegetarian
Nutrition
- Serving Size: 1
- Calories: 340
- Sugar: 25g
- Sodium: 270mg
- Fat: 18g
- Saturated Fat: 10g
- Unsaturated Fat: 6g
- Trans Fat: 0g
- Carbohydrates: 31g
- Fiber: 1g
- Protein: 13g
- Cholesterol: 215mg
Discover more cozy dessert recipes in minutes, comfort and sweetness await in every mug.
👉 Save your next craving on Pinterest boards and discover more no-bake dessert recipes you can make in just minutes.
👉 Join me on Facebook page and discover more quick dessert recipes made with love, your next 5-minute chocolate moment is waiting!
“If you tried this recipe, tell me how it turned out. Did you keep it gooey or cook it fully?”